Elliptical Hoop
Fresh off the success of my bustle for Steamcon II, I decided I’d try stepping it up a notch and make myself an Elliptical Hoop like the ones used to support skirts from a short transitional period between around 1865 through 1870. It’s a weird period where you can literally see the fullness of the traditional circular crinoline cages on the 1850’s and 1860’s (think United States Civil War era ladies fashion) moving further and further back to eventually become the bustles popular through 1870’s through 1890.
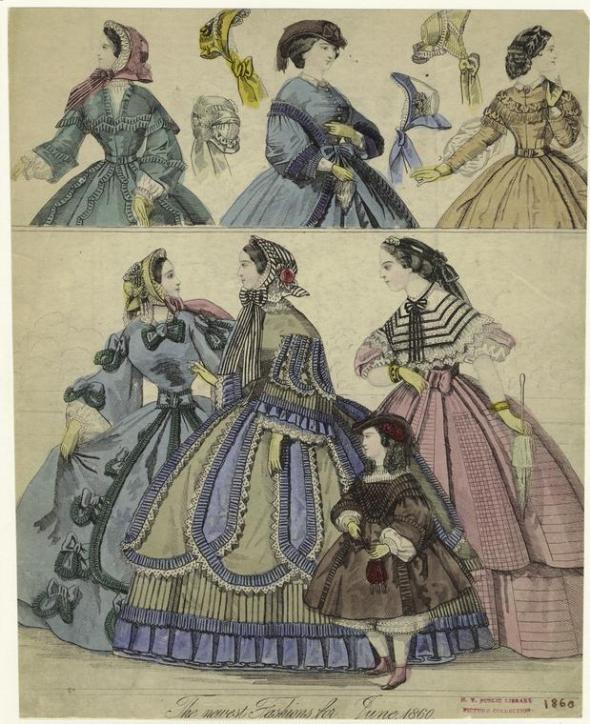
Above is a fashion plate from 1860 showing the circular hoop silhouettes which were popular from the 1850’s through ~1865.
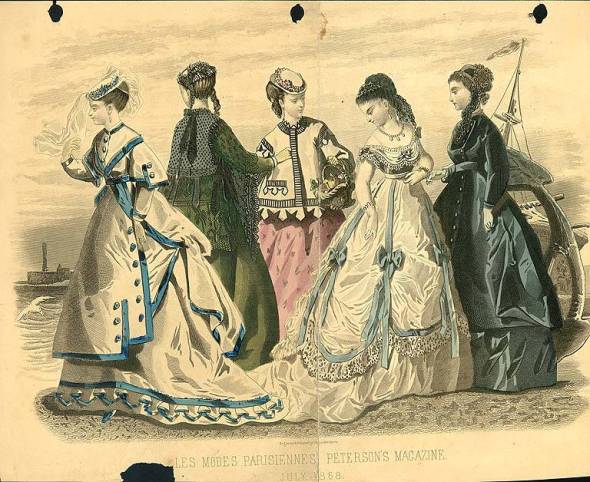
This fashion plate from 1868 shows the elliptical hoop skirt silhouette with fullness moving to the back of the skirt and skirt designs transitioning away from radial symmetry. Is anyone else totally in love with the asymmetrical design used on the white and blue dress on the far left? I’m smitten. 🙂
By 1869 you can really see the transition – there’s still more fullness to the sides of the skirts than there is with a lot of later bustle dresses, but the bustle has definitely established itself and caught on.
So are you curious to see what might’ve been supporting those skirts? 🙂
I say “might” because the more I research the more I find different hoop and bustle designs – they really weren’t standardized at ALL, but I’ve seen a few elliptical hoops that look very similar to this, and it’s such a lovely photo, isn’t it? 🙂 It looks to me like a very early elliptical hoop, since it seems to emphasize the push backwards, but without any of the bustling you see later on in the fashion plates. However, it’s entirely possible that the wearer could have added additional bustle pads above the hoop to create the additional fullness. Victorians were pretty resourceful. 😉
Long story short, I’m pretty damn smitten by elliptical hoop style dresses, so I set about to looking for a pattern to make my own. Again I turned to Truly Victorian (this whole blog is starting to feel like a huge advertisement for TV, lol – but hey, they make GREAT patterns!), and ordered their 1865 Elliptical Cage Crinoline pattern and three 12 yard rolls of hoop wire. It’s using a different design then the elliptical hoop shown above, and uses ties placed at the rear to create the elliptical bustle shape. It also uses fewer stays (hoop wires?) than the historical example. I believe modern hoop wire has more strength than historical wire, but it may just be to save material costs? I think more wires may be the way to go though if I ever make another hoop skirt – it’s easier to hide the wires under petticoats if you don’t have huge gaps between each wire.
I also ordered the pattern for the 1865 Elliptical Skirt since I knew eventually I’d want to make skirts and petticoats to cover the hoops. 🙂
The above photo from Truly Victorian shows what their finished hoop skirt looks like when completed.
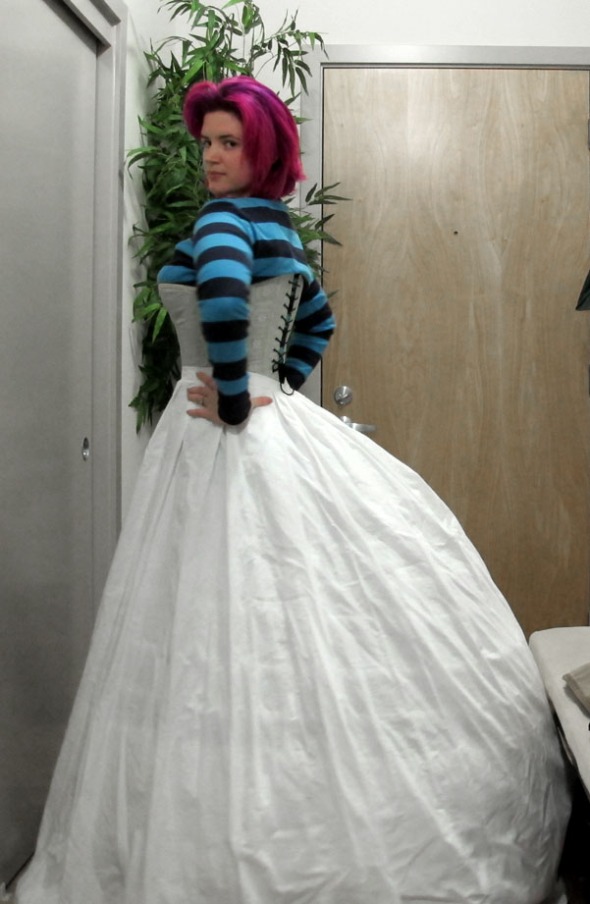
And here is my finished Elliptical Hoop with muslin Elliptical Skirt petticoat (and totally asynchronous striped top – lol) :
Be warned! This hoop took a LOT of hand sewing for me! I wasn’t able to fit the skirt with wires under my sewing machine, so I had to hand sew each individual point where the hoop meets up with the stabilizing ribbon. I’m sure there must be an easier way to do this, maybe if I’d waited to add the hoop wire into the bone casings until after I’d sewn the casings to the stabilizing ribbons? But there’s a step where you need to have the hoop wires in the casings before you sew the casings to the ribbon in order to check balance and correct joining placements. So blah. I don’t know. Maybe the trick is to not keep your sewing machine in a tiny corner on your desk next to your computer where there’s no room for giant hoop skirts. 🙂
But I digress. Back to the skirt!
This skirt is almost too big to fit in my hallway. 🙂 Almost.
Obviously I still need to hem the petticoat, and I think I may add some rows of ruffle to further disguise the hoop wire underneath, but I keep putting it off with the thought that eventually I might buy my sewing machine a ruffling foot, and then wouldn’t I feel foolish for hand ruffling a whole skirt? 😉 It’s faultless logic, really.
I haven’t really decided what to do with this hoop skirt yet, but that might be a topic for another post. 🙂
Steamcon II!
With Steamcon II fast approaching, I had to figure out what all I could get done before the big day (remember, I only had about 3 weeks from start to finish until Steamcon, including ordering patterns, finding fabrics and corset supplies, and creating accessories, so time was of the essence.)
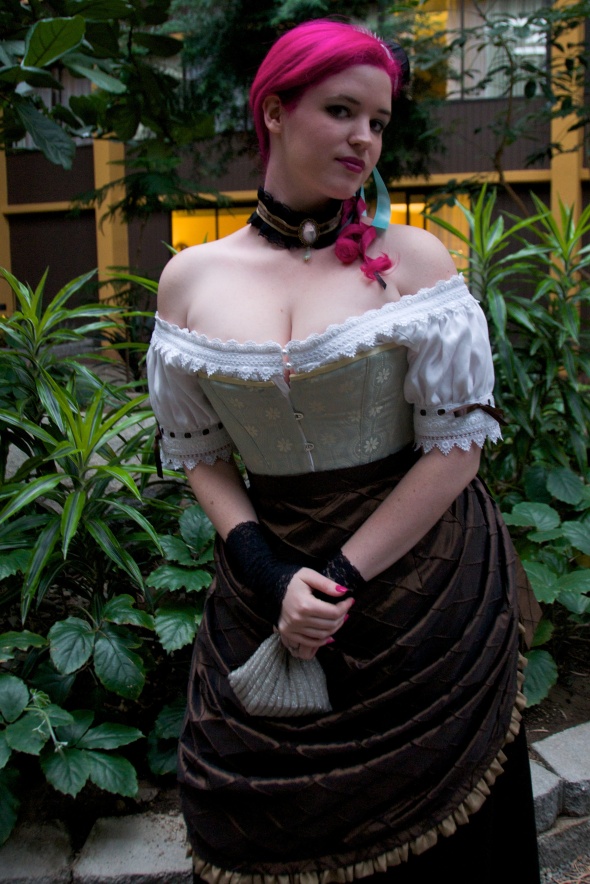
I ended up deciding that since this was Steam Punk and not strictly historical recreation, I could get away with no bodice. Not creating a bodice for my outfit also had an added bonus of allowing the hard work I’d done on my corset and chemise to be visible. Win. 🙂 So that left me with skirts and accessories. Before I get into the nitty gritties, wanna see the final product that I ended up wearing to Steamcon? Of course you do. 🙂
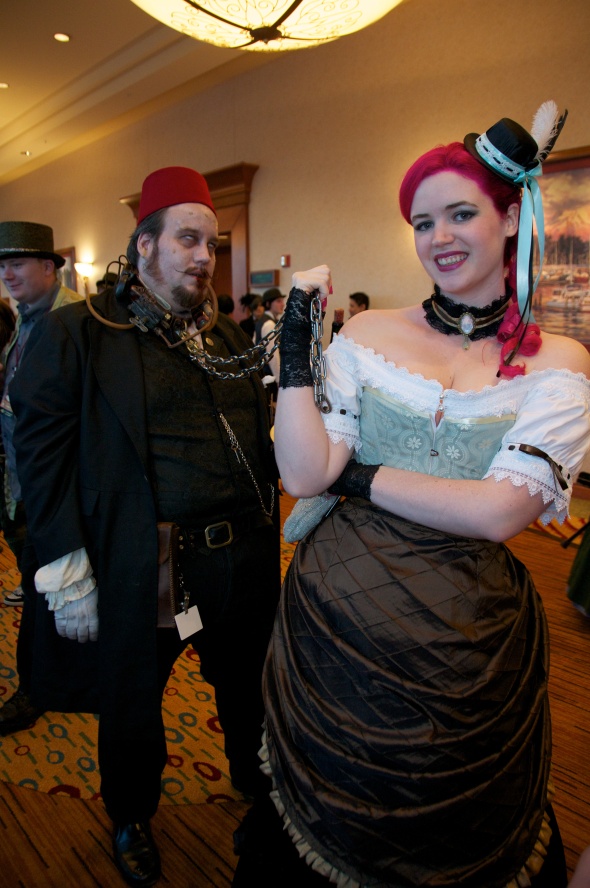
Ta da! Steamcon II was held at a great hotel down by the SeaTac Airport with a beautiful indoor atrium area. Wonderful for photo taking. Thank you to my friend Aidan for the lovely photos! 🙂
The first project I tackled was a long black skirt to go over the bustle. I figured black would be a good staple, something that I could use in the future with other pieces if I needed to. I used Truly Victorian’s 1885 Four Gore Underskirt pattern with pleated back, and added pleating at the hem. The fabric was a black home decorating fabric with a bit of a sheen, picked up again at Jo Ann’s. This fabric was lovely, but was tricky to keep pleated. I ended up making my own pleater board out of card stock, but that’s a subject for another post. I used three rows of top stitching about an inch and a half down from the top edge of the pleats to hold them to the edge of the skirt, but they refused to stay up. When I re-wore this skirt for Steamcon III I revisited this skirt and tacked the top of each pleat up onto the skirt by hand for a more orderly appearance.
For an overskirt I found some chocolate brown smocked taffeta and used Truly Victorian’s Waterfall Overskirt pattern, shortened by about 4 inches in front and back. I used a beautiful desaturated gold/tan fabric I found at Hancock Fabrics for the lining and front ruffle. I was so stretched for time by this point that I was still sewing the ruffle on to the overskirt by the morning of the convention. I also found that using ribbon under the front of the overskirt to tack down some of the pleats helped with the look of the skirt immensely. On the day of the convention my friend Jean added two tiny hot pink bows to match my hair. 🙂
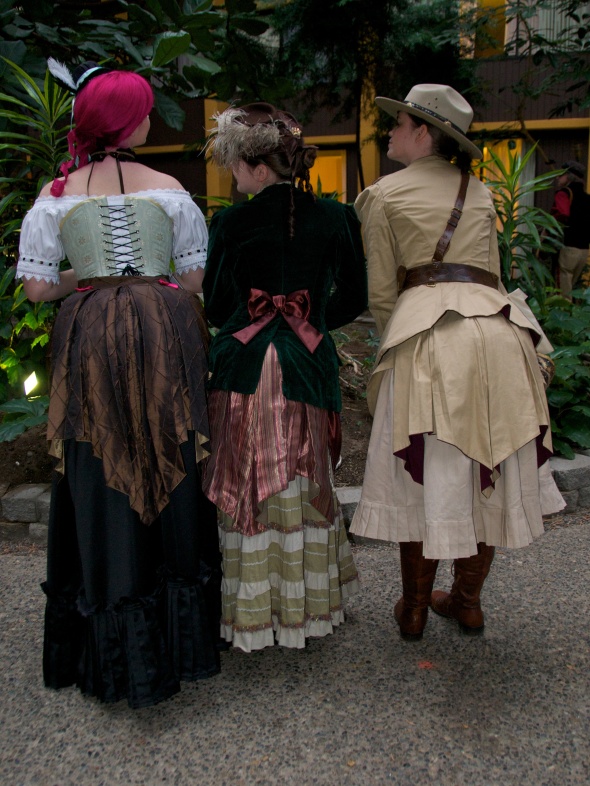
Me, Jean, and Claire showing off our awesome bustles. Fun Fact – Claire’s skirt and overskirt were made using the same base pattern as my skirt and overskirt. Huzzah for the magic of fabrics and pattern alteration. 🙂
All that was left was to accessorize! I bought a small black felt top hat at the Ben Franklin Crafts, and Jean helped to cover the hat in matching black satin left over from my skirt and decorate with feathers and ribbon to match my corset. We made asymmetrical stretch lace gloves using a zig zag stitch and some black stretch lace, and made a choker from leftover fabric and lace scraps and a broach from the craft store.
The morning of the convention I added some long pink curled extensions to my hair, and that was that! Jean and I wield a mean curling iron. 😉
Claire introduced me to The League of Steam at the convention, so I had to get a photo with Zeddediah the Zombie. 🙂
It’s Bustle Time!
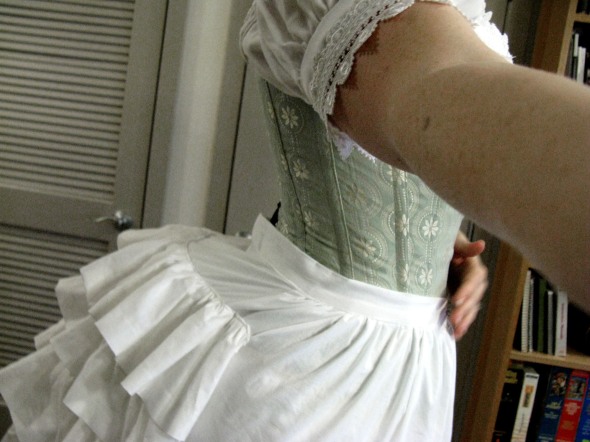
The next project in preparation for Steamcon was to make myself a bustle. After having such great success with Truly Victorian patterns with my corset, I went to them again for the bustle, using TV101 and their precut bustle wire. This whole bustle went together in about a day and a half, but it would’ve gone much faster if my sewing machine had a ruffleing foot. I think gathering each ruffle was what took me the longest (it was murder on my finger tips, too.) But the result looked great, and you can’t see the hoop wire at all once it’s all under skirts.
The bustle is made to be hemmed a few inches higher than your outer skirts to reduce the likelyhood of stepping on it when going up stairs and the like, but it looks a little silly when worn all alone. 🙂 I was also very pleasantly surprised at how easily the bustle collapses for storage and ease of sitting.

